Quick example of how I built the foot
I started with a rough dynamesh
Used the Clip Curve brush to remove the toe nubs
I created new geometry from Zspheres and duplicated them as subtools. After moving them into place with the Transpose tool...
I Merged all of the toes into a single subtool. I applied Dynamesh to merge them with the foot.
CTR+Click dragged to remesh everything into a single piece. I applied a toenail shaped mask to the toes and used the Extract Geometry tool within the subtool palette. After applying that function you have a new subtool containing the toenail geometry. Using this method you can manipulate geometry without effecting the forms in other subtools. It's much easier than trying to sculpt everything from one mesh.
This is the result of the same process, with more careful placement and attention to anatomical forms
Saturday, February 27, 2016
Next Week
Home work for next week is to come in with a Zbrush model of your concept. Use the techniques we covered thus far.
Dynamesh, Zspheres, basic sculpting. If you need a refresher on the basic functions the hotlinks to the Zbrush Documentation are
here: Dynamesh, http://docs.pixologic.com/user-guide/3d-modeling/modeling-basics/creating-meshes/dynamesh/
here: Zspheres , http://docs.pixologic.com/user-guide/3d-modeling/modeling-basics/creating-meshes/zspheres/
Next week we'll be going over a neat mesh creation mode called Shadowbox and how to break up your mesh into Polygroups for easier editing and selection. <---- Polygroups and subtools open up a lot of doors once you understand the logic.
AND TENTACLES.....we are making tentacles
While saving files has proven to be a bit of a chore, I've had luck using google drive. The Ztool files are of a manageable size and it foregoes the hassle of remembering flash drives
Thursday, February 25, 2016
Wednesday, February 24, 2016
Stuff and Stuff
Hi everyone, sorry about the late blog post this week. We've deviated pretty sharply from the original syllabus I laid out at the beginning of class. Since Zbrush seems to be what everyone is most interested, we'll be focusing on using it for concepts and illustration. I had the idea that we'd be wrapping up the playing card by now, but it's probably worth it to use the monster to explore different tools in Zbrush. We'll talk about that in class though.
I took some time to put together a customized Zbrush interface that drastically cuts down on the amount of crap you need to wade through to get to the vital tools.
We are going to build on last weeks zbrush session by going over a few ways to create base meshes.
Zspheres, ZSketch, and we'll touch on using the Zmodeler brush.
That'll be enough for one week
Thursday, February 18, 2016
Zbrush Vids
http://pixologic.com/zclassroom/
these are great videos, I learned a lot from them. They have totally reorganized all of the videos and have added new content in the last three months. Have at it!
these are great videos, I learned a lot from them. They have totally reorganized all of the videos and have added new content in the last three months. Have at it!
Wednesday, February 17, 2016
Tuesday, February 16, 2016
Sunday, February 14, 2016
ALSO....
In other news I like you guys so much, I bought a copy of this DVD for class
http://www.thegnomonworkshop.com/store/product/157/Visual-Storytelling-with-Iain-McCaig-Vol.1#.VsD5bvIrLLs
It's 2 hours long and a great way to understand the visual story-teller's mental space. Plus watching him draw is entertaining in and of itself. We can take a class session to watch it, or find another time that works for people. Leave a comment with your vote
Next Week
Hi Everyone sorry about the delay in posting this.
Great work this week everyone, excited to see where everyone is going to end up by the end of the semester.
Great work this week everyone, excited to see where everyone is going to end up by the end of the semester.
Homework hasn't changed, place your concept into a narrative setting. Again, it doesn't have to be a literal environment. It should be interacting with other elements, whether they are designed symbols, ornate border designs, or photographic elements. Again, this project isn't about getting a perfect product. It's about giving a taste of how much work should go into deciding what you want to portray. Something that is often neglected in studio art education.
By popular demand, next week, we will be getting acquainted with 3d-programs. Zbrush should be installed on 5 of the computers in the lab by next week. Seats for everyone would be ideal. But from my experience, the lab is empty most of the time. It shouldn't be too difficult to get some desk time. I promise, after 30 minutes of basic instruction you'll be able to create useful assets, and after an hour you'll be completely hooked.
I know not everyone has the means to outfit themselves with the necessary equipment at home, so I am not requiring the use of 3d in the homework. I emphatically suggest that you make an effort to visit the lab and learn some skills that (GASP!) may one day translate into employable skills!
I recommend that people get copies of Sculptris for their own computers. It has enough features to be useful without being overwhelming. Models created in either program are cross compatible.
http://pixologic.com/sculptris/
Thursday, February 11, 2016
John's Updated fishmanboobs design.
Blair, please tell me how I could make this better.
I dont want to start working on the value study until know that the character is at an acceptable level.
Thanks -John
I dont want to start working on the value study until know that the character is at an acceptable level.
Thanks -John
Wednesday, February 10, 2016
Saturday, February 6, 2016
By the Way
When you begin to work out the details of your design, bump up your resolution as high as your computer will allow. The computers in the Lab are 3.1 ghtz i7s with 16 megs of Ram.
My laptop is a 2.8 ghtz i7 and it handles files over 100k pixels wide without a problem
My laptop is a 2.8 ghtz i7 and it handles files over 100k pixels wide without a problem
Friday, February 5, 2016
Homework for next week
Pick one of your concepts and refine it. I want one thoughtfully considered rendition of the concept.
Use motifs pulled from your research and consider the small format the final piece will be displayed in. Most standard playing cards are 2.5" x 3.5". Think about creating organized masses of value and form that will read well at that scale.
I highly recommend using Pinterest as a way to catalog your visual research. I'm terrible about keeping my hard drive organized. I just find Pinterest easier to manage for small projects like these.
I've gathered up a few examples of work that solves major design problems. Concept art is about solving the problem of what you want to portray. Illustration is deciding how you want to portray it.
All of these examples are drawn from film, both live action and animated.

Pixar Stuff,
Dermot Powers,

Iain Mccaig,
Looking forward to seeing everyone's work next week. Feel free to post on the blog at anytime with questions, I'll try to address them in a timely manner.
Also, Please have your work uploaded to the blog before class starts next week. In the interest of time, I'll critique the work out of class and post revisions during the week. It will allow me to be more thorough in my critiques and cover more information in class.
Use motifs pulled from your research and consider the small format the final piece will be displayed in. Most standard playing cards are 2.5" x 3.5". Think about creating organized masses of value and form that will read well at that scale.
I've gathered up a few examples of work that solves major design problems. Concept art is about solving the problem of what you want to portray. Illustration is deciding how you want to portray it.
All of these examples are drawn from film, both live action and animated.
Pixar Stuff,
Dermot Powers,
Iain Mccaig,
Looking forward to seeing everyone's work next week. Feel free to post on the blog at anytime with questions, I'll try to address them in a timely manner.
Also, Please have your work uploaded to the blog before class starts next week. In the interest of time, I'll critique the work out of class and post revisions during the week. It will allow me to be more thorough in my critiques and cover more information in class.
Thursday, February 4, 2016
Madeline Fried Monster Sketches
Amikiri (bird head, crab hands, snake body)
Basan (fire-breathing chicken)
Omukade (human-eating centipede)
Sazae-Oni (snail lady)
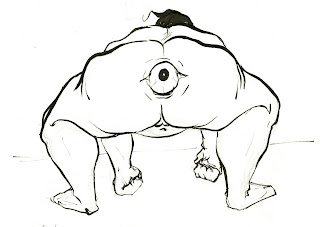
Shirime (eyeball butthole)
with snakes
Subscribe to:
Comments (Atom)


